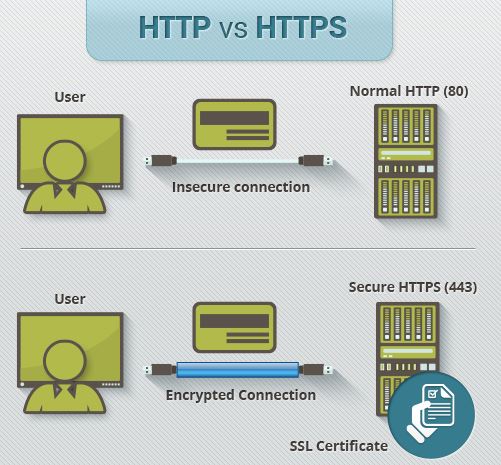
HTTP (HyperText Transfer Protocol) was originally introduced in order for network administrators to share information between websites and browsers.
In recent years, most websites have begun to use HTTPS (HyperText Transfer Protocol Secure) for better security. HTTPS relies on one of two methods to encrypt and translate information between sites:
-
Secure Sockets Layer (SSL) or Transport Layer Security (TLS).
These work in the same way by using what is called a Public Key Infrastructure (PKI). Essentially the system uses two “keys” to encrypt information, a public key and a private key.
-
If something is encrypted with a private key, it can only be unlocked with a public key and vice versa.

What's the benefit?
Anything sent over HTTP is sent in ‘plain text’, meaning it can be intercepted and easily hacked. This poses danger if the information being communicated is highly sensitive i.e credit card information.
The purpose of HTTPS is to encrypt this data, making it impossible for anyone to hack the information even if they were to intercept the connection. This means the data and information sent will stay safe.
There has been a push for as many websites as possible to be switched from HTTP to HTTPS to maintain security across the web, and prevent as many cases of hacking and fraudulent behaviour as possible. Businesses and consumers are becoming more savvy to the benefits to HTTPS as they go about activity online, meaning if you’re not switched over yet you should look at doing so sooner rather than later!
Process to switch into HTTPS
If you are familiar with the backend of a website, then switching to HTTPS is fairly straightforward in practice. The basic steps are as follows.
-
Purchase an SSL certificate and a dedicated IP address from your hosting company.
-
Install and configure the SSL certificate.
-
Perform a full back-up of your site in case you need to revert back.
Configure any hard internal links within your website, from HTTP to HTTPS.
-
Update any code libraries, such as JavaScript, Ajax and any third-party plugins.
-
Redirect any external links you control to HTTPS, such as directory listings.
-
Update htaccess applications, such as Apache Web Server, LiteSpeed, NGinx Config and your internet services manager function (such as Windows Web Server), to redirect HTTP traffic to HTTPS.
-
If you are using a content delivery network (CDN), update your CDN’s SSL settings.
-
Implement 301 redirects on a page-by-page basis.
-
Update any links you use in marketing automation tools, such as email links.
-
Update any landing pages and paid search links.
-
Set up an HTTPS site in Google Search Console and Google Analytics.